
Let's Get Started!
Don't need any help? Jump right in! Or, scroll down for a quick-start guide on using CageMaker on OpenSCAD Playground.
CageMaker PRCG on OpenSCAD Playground
IMPORTANT NOTE: This runs a java-based port of OpenSCAD on the web browser without
having to install OpenSCAD. The files to perform this are about 60 megabytes in
size. This might be a bit slow to open at first on a slower connection.
CageMaker PRCG Github Repository
CageMaker PRCG Documentation (Wiki)
This project is funded entirely out-of-pocket by its author - please show him some love with a donation to any (or all?) of the following:
Patreon | Buy me A Coffee | thanks.dev
CageMaker + OpenSCAD Playground Quick Start Guide
The first step is to find the dimensions for the device to cage. This can be done by looking for the manufacturer's information on the device, or the old-fashioned way with a ruler or caliper or similar. Accuracy is helpful, however, in ensuring the cage safely holds the device.
Once the device's dimensions are obtained, enter them in the device_depth, device_width, and device_height settings.
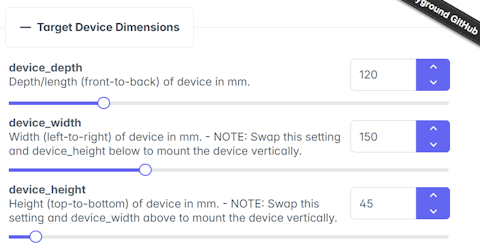
HINT: To rotate a device 90 degrees for sideways mounting, swap the device_width and device_height settings.
Next, select the size of the rack into which the cage will be mounted. CageMaker PRCG defaults to creating full-width cages for 10" racks, but supports partial-width cages that bolt together on wider racks as well as supporting most common micro- and mini-rack systems.
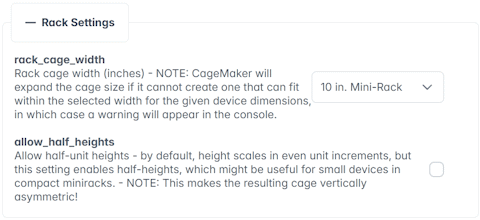
HINT: By default, CageMaker PRCG generates rack cages that are full rack "units" in height, and scales automatically to fit the device plus a support structure to hold it. Enable the allow_half_heights option to change this to half-unit multiples, which is often useful for smaller racks.
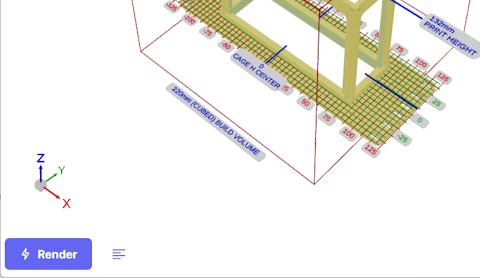
If your printer has a smaller build volume than the width of the rack, such as a 220mm print bed and a 10" rack, enable the split_cage_into_two_halves option. (Optionally, but this is recommended, consider enabling the extra_support and add_alignment_pin_holes options.)
Make other changes as you see fit, and once you have the cage you desire, click the Render button at the bottom-left. This will cause OpenSCAD Playground to generate the 3D object.
Once the render process is complete, click the Download STL button at the bottom-left to download the completed 3D object file. Slice and print!
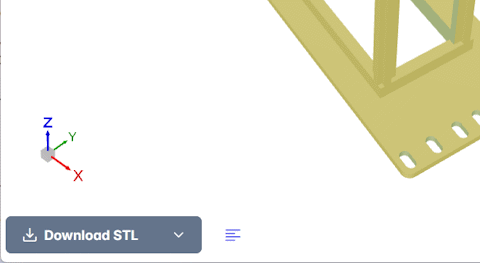
HINT: OpenSCAD Playground can also export 3D objects as GLB, OFF, and 3MF files. Choose whatever works best for your slicer.
This website and its contents are Copyright © 2026 by WebMaka, unless
specified/credited otherwise. All Rights Reserved.
OpenSCAD Playground provided by Olivier Chafik
CSS template provided by W3C
Icons provided by FontAwesome